If you’re looking for a picture to use in a project – a Powerpoint presentation, Word document, blog post, whatever – you probably do a Google image search. Google has made that a bit more difficult.
A few weeks ago Google removed a button that made it easy to save images from a web search. Not to worry! There’s an easy workaround. I’ll give you some background and the easy workaround, and then keep reading for exciting free bonus content – an interesting search option from Google that you don’t know about, and some basic info about how to take screenshots in Windows.
Let’s start with the basics. You know you can search for images with Google, right? There’s a link in the upper right of the main Google search page at www.google.com, shown above.
Or you can go directly to the Google Images search page.
But the easiest way to search for images is to do a search on Google just like you would search for anything else, then click on Images in the search results, right below the search bar, shown above.
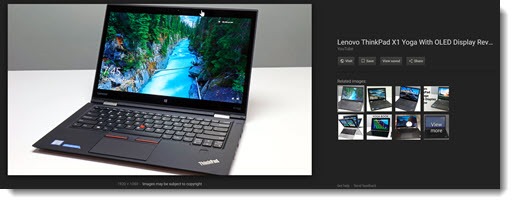
You’ll get a page of images as a search result. Click on a picture and you’ll get a preview with several buttons to the side. So far everything is familiar.
Until recently there was a button that said “View image.” You could click on it to see an image in its full resolution, making it easy to save it and use it in a project.
Without the button, it appears the only option is to click the “Visit” button and go to the website hosting the picture; then hunt for the image on the page; and then hope that the site hasn’t disabled the options to save it.
Funny story about why the button was removed. Google made our searches more difficult to accommodate a big company that complained. Getty Images filed antitrust charges against Google in the EU a couple of years ago, asserting that Google made it too easy for us to scrape images from the Internet without ever being exposed to copyright notices and watermarks, not to mention that we were able to avoid the ads that websites are so anxious for us to see.
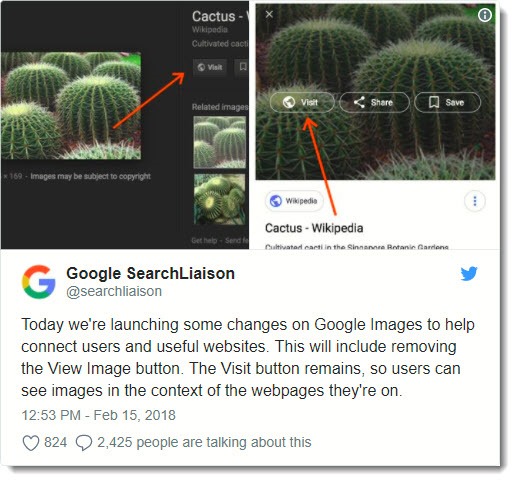
Two years after Getty’s complaint, the above tweet from Google appeared out of nowhere, announcing that the View Image button was being removed. It is obvious (although not announced by either party) that the removal of the button is part of the settlement between Google and Getty, along with a licensing deal for Google to use Getty images and a more prominent display of copyright info beneath images in Google’s search results. Make no mistake: at Getty’s insistence, the whole point of the changes is to make image searches more frustrating.
There was much outrage online, of course, because there is outrage over everything.
How to work around the missing “View image” button
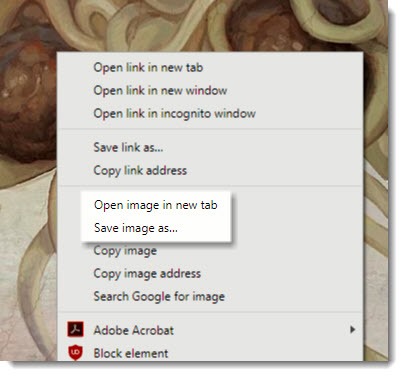
Click on a picture in Google’s search results so you get the preview with the buttons, then right-click on the picture. The right-click menu in Chrome has two useful options: Open image in new tab, which works just like the View Image button and opens the full resolution image by itself in a separate tab; and Save image as . . ., which saves the image to your downloads folder, usually (but not always) in full resolution.
An interesting search option

Google removed another button from the image search page and turned it into a drag-and-drop feature. Drag an image from anywhere on the image search page toward the top of the window. A box will appear immediately to drop the image and do a web search based on that image.
It’s not just looking for similar images, although it does that too. It actually does a search based on what’s in the picture, so you’ll get search results as if you had typed in a search term. It’s like many Google features, easy to use once you know about it and a bit amazing.
How to save screenshots in Windows
If you just need a quick image and you’re not worried about getting the highest resolution version, there are three ways to take screenshots in Windows when you find an image you like.
• Hit the Windows key + PrtScn. Your screen will briefly go dim and a screenshot of the entire screen will be saved into your Pictures / Screenshots folder.
• But even better, don’t forget an old friend, Snipping Tool. Click on Start, type in snip and you’ll see it on the menu. After you start it, right-click the icon on the taskbar and click on “Pin to Taskbar” so you have easy access next time. When you start a snip, you can drag the mouse to draw a rectangle around anything onscreen. Your snip is automatically put on the clipboard so you can immediately switch to another program and paste it in, or you can save a .JPG from the Snipping Tool menu. There are options for different shapes and a new button in Windows 10 to delay the snip for a few seconds so you can arrange things onscreen. Snipping Tool has been part of Windows for more than ten years, introduced in Vista. Make it your best friend.
• If you save screenshots regularly, though, spend $49.95 on Snagit. Oh, stop whining, big spender, don’t agonize about it, just do it. Snagit will pay for itself ten times over. Snagit takes over the PrtScn key with its own flexible tools for creating a screenshot; it’s got many more options for saving screenshots plus a lovely image editor that excels at markups, adding arrows and text and all the tools you need to add images to your work. I use Snagit many times every day, and I’m just a normal guy, right? No, hang on, let’s not go there, that’s likely to be a sidetrack. Let’s just say that it might be right for you.
Have fun with your images!




Screen captures? Use Green Shot – http://getgreenshot.org/ – fabulous and free 🙂
Cool! I hadn’t run into Greenshot before. Looks great.